eSIM Tours Usage Guide
2026-01-08eSIMTours Support Team
eSIM Tours Usage Guide
1. Overview
This document aims to detail the full-process operation methods such as registration, login, purchase, and activation on the official website of eSIM Tours (https://www.esimtours.com), applicable to all new and existing users who need to use the services of this official website.
2. Operating Environment Requirements
- Devices: Terminal devices with normal internet access such as computers, mobile phones, and tablets
- Browsers: It is recommended to use mainstream browsers like Chrome, Safari, and Edge. Ensure the browser is updated to the latest version for smooth operation
- Network: A stable internet connection
3. Detailed Operation Process
3.1 Registration and Login
3.1.1 Access Official Website
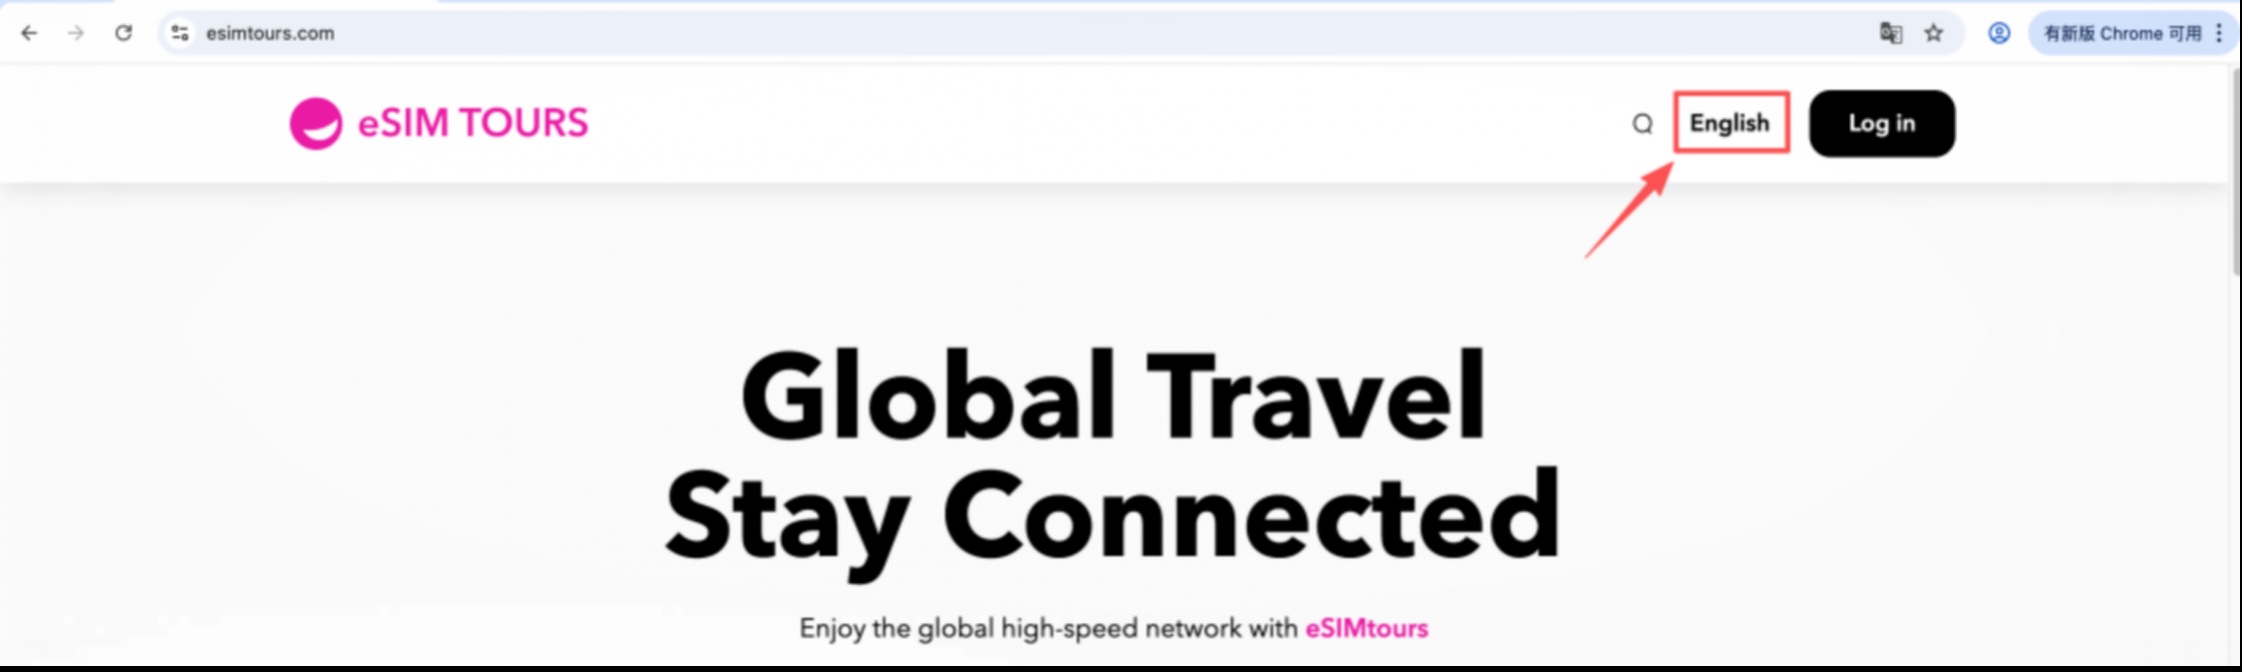
Click the URL: https://www.esimtours.com, or enter the corresponding URL in the browser
3.1.2 Switch Language
On the upper right corner of the official website's homepage, you can switch the webpage language by clicking "English" or "简体中文" (Simplified Chinese). This manual uses "English" for demonstration.
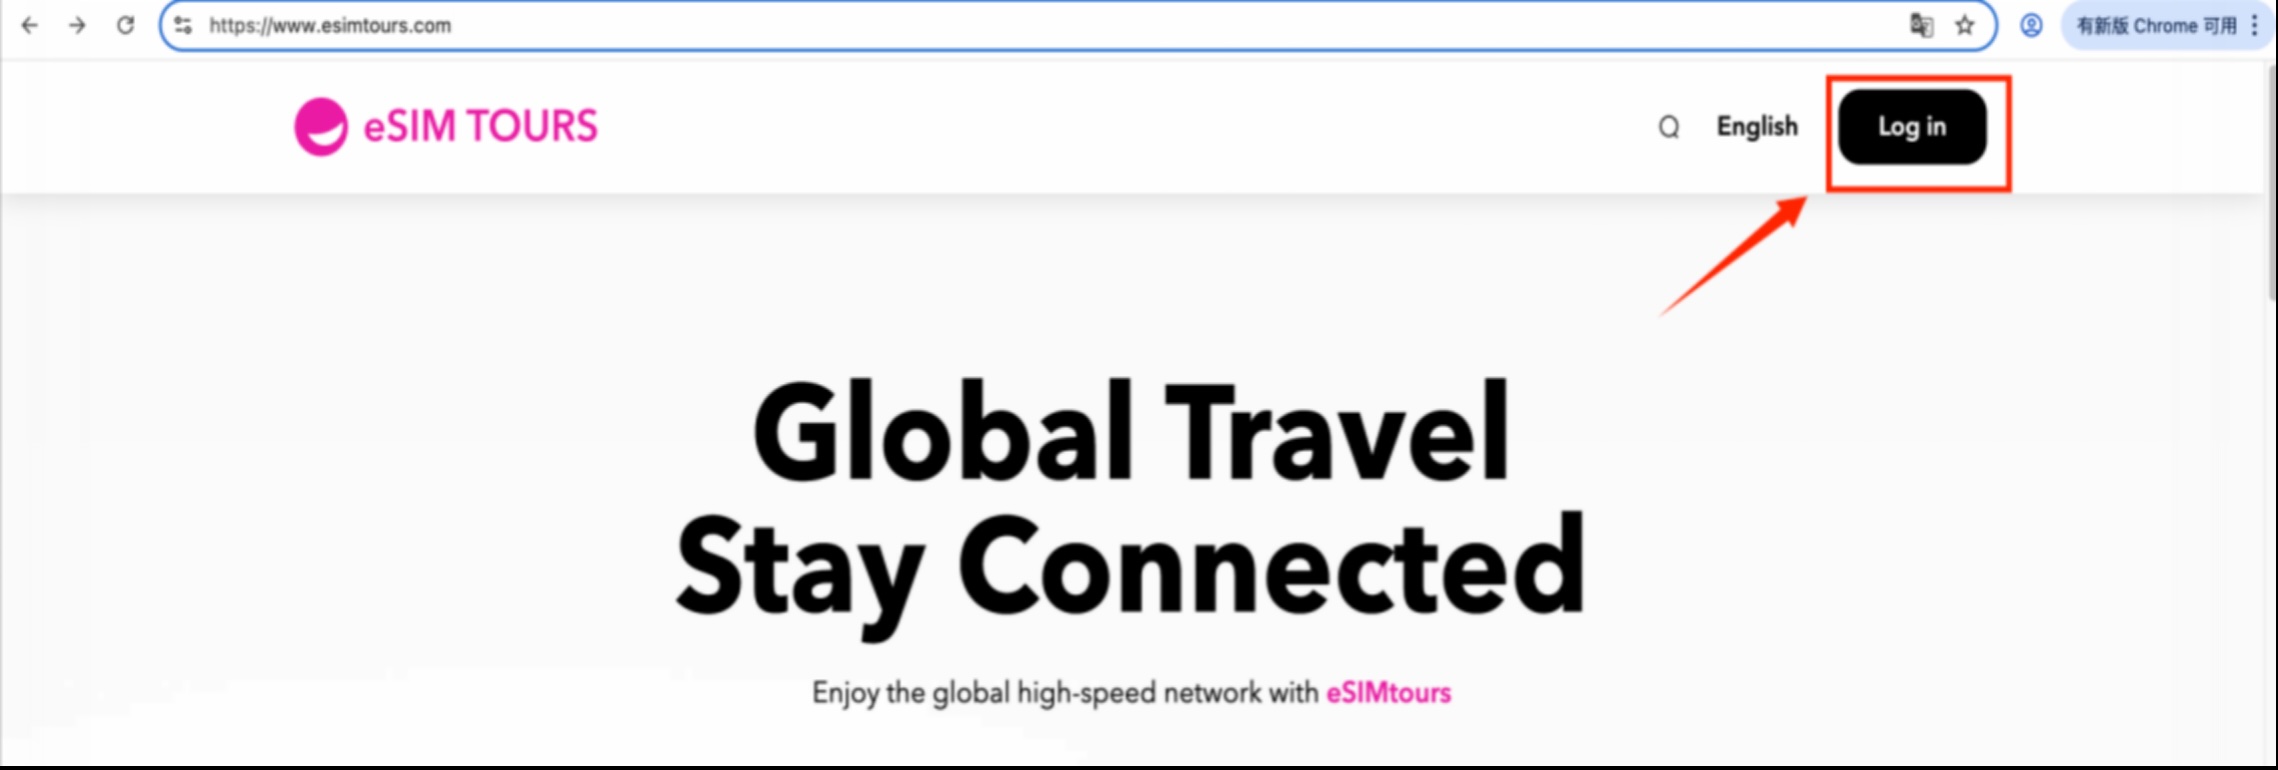
3.1.3 Enter Login Page
Click "Log in" at the upper right corner of the official website to enter the login or account registration page.
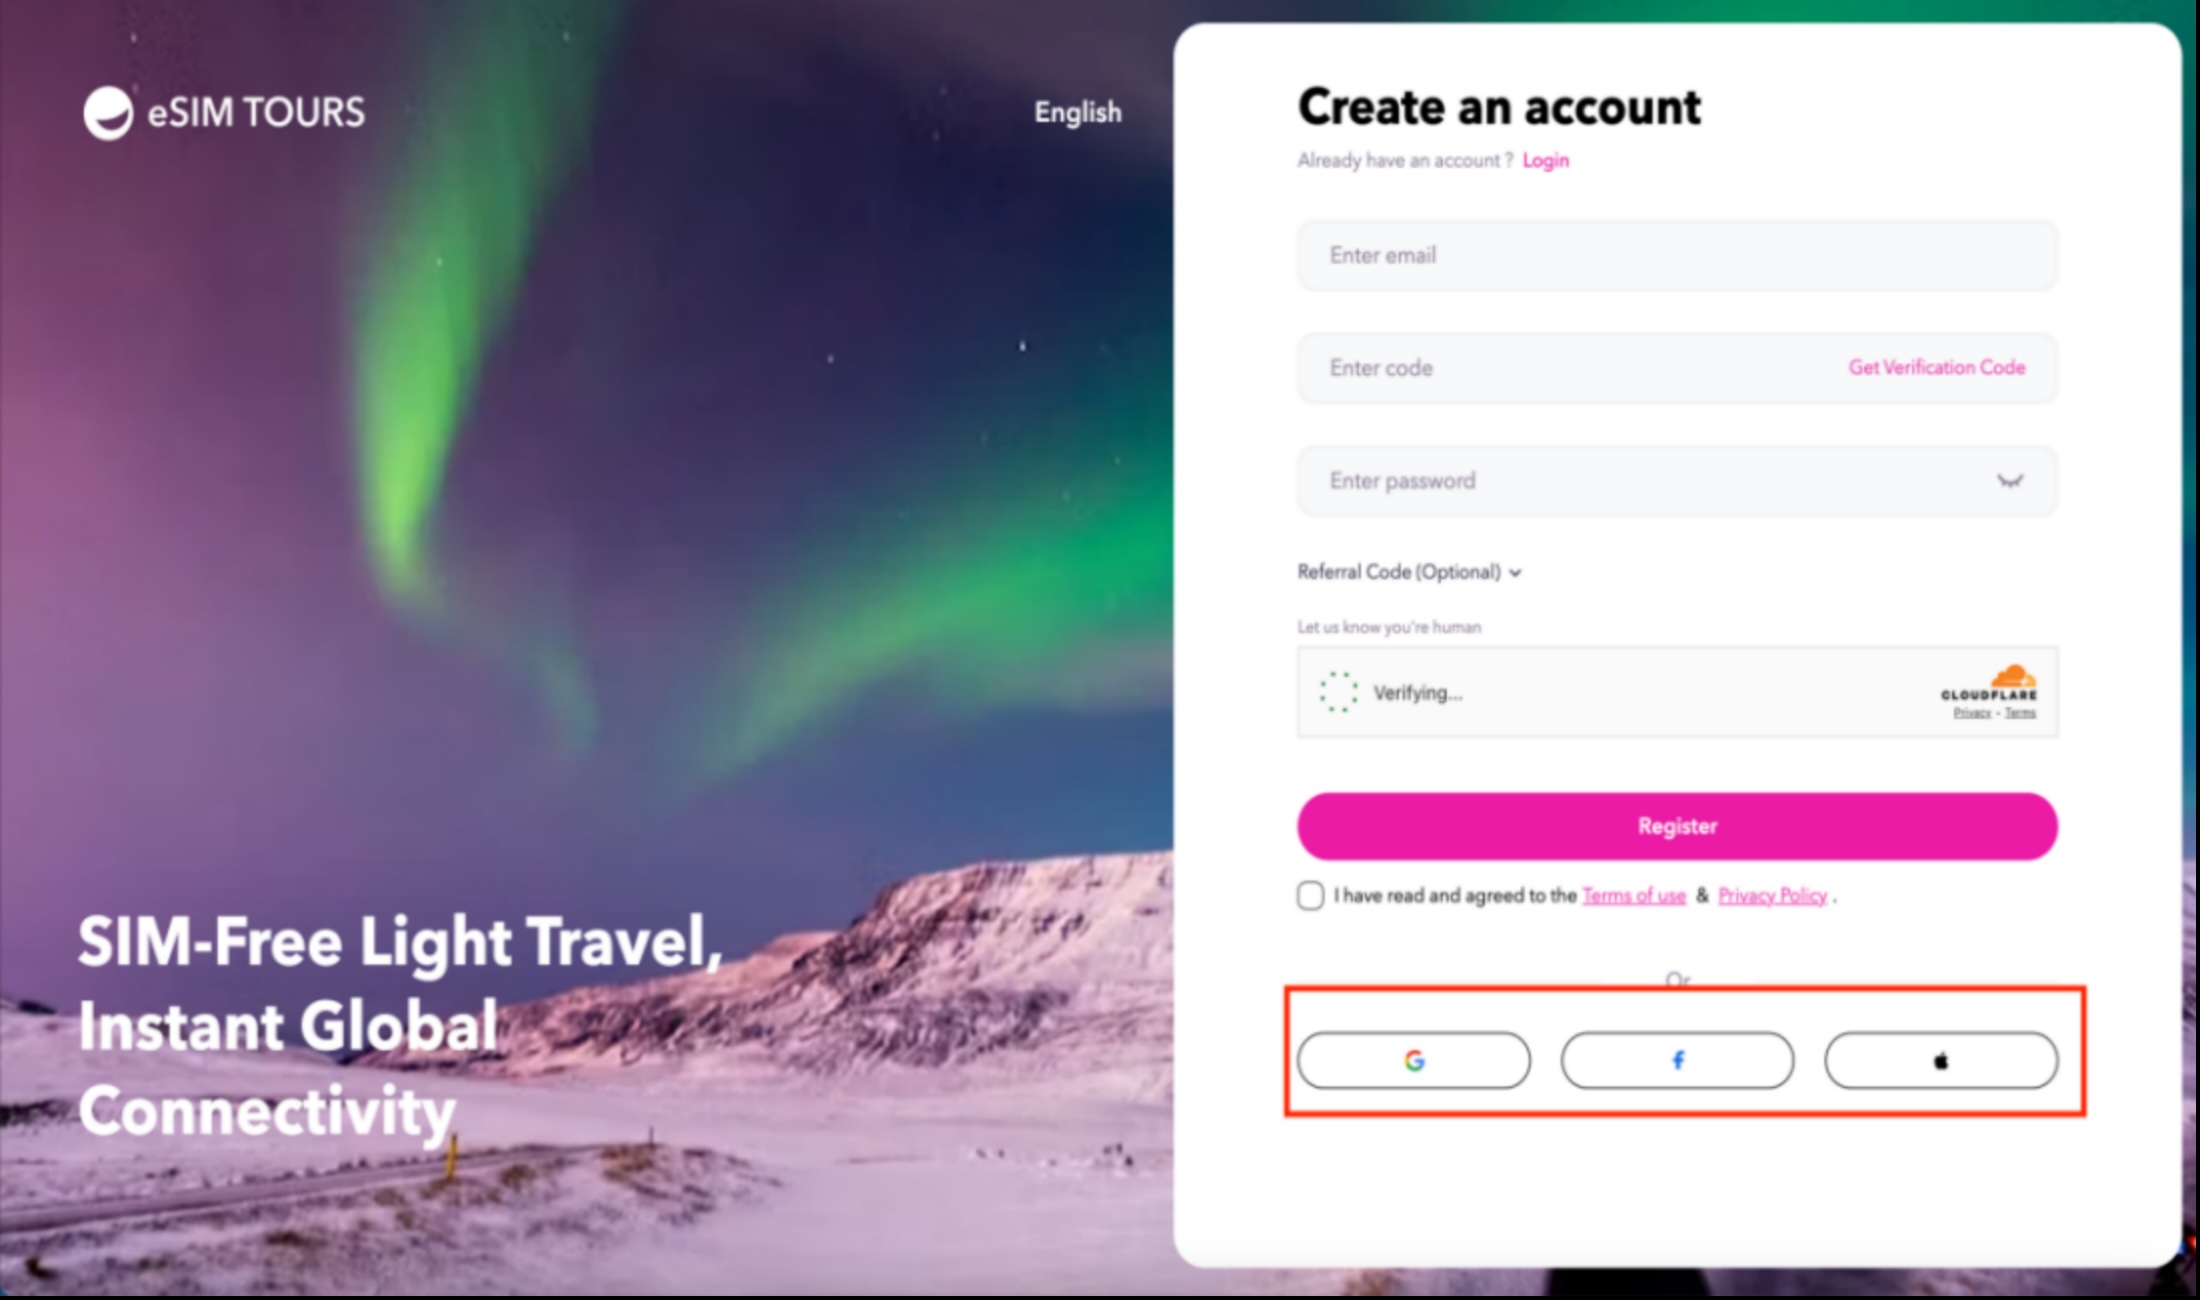
3.1.4 New User Registration
On the login page, click the "Register Now" link to access the registration page.

We offer 2 registration methods for you to choose freely:
Email Registration: Enter your email address → Obtain verification code → Fill in the verification code and set a password → Check to agree to the terms → Click "Register Now".
If you have an inviter, you may also fill in the referral code in the designated field.
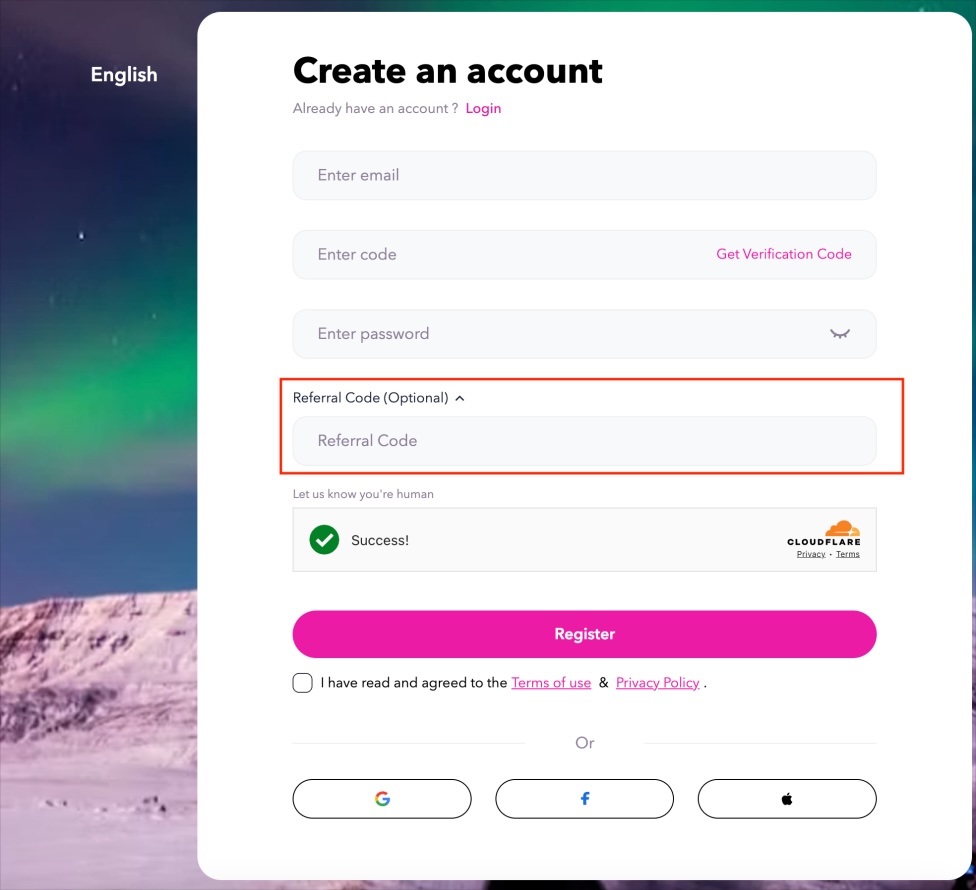
Social Account Registration: Directly click the Google / Facebook / Apple icon at the bottom of the registration page and authorize the corresponding account to complete the registration.
3.1.5 Login for Registered Users
On the login page, directly select your preferred login method:
Email Login: Enter your registered email address and password, then click "Login" to access your account.
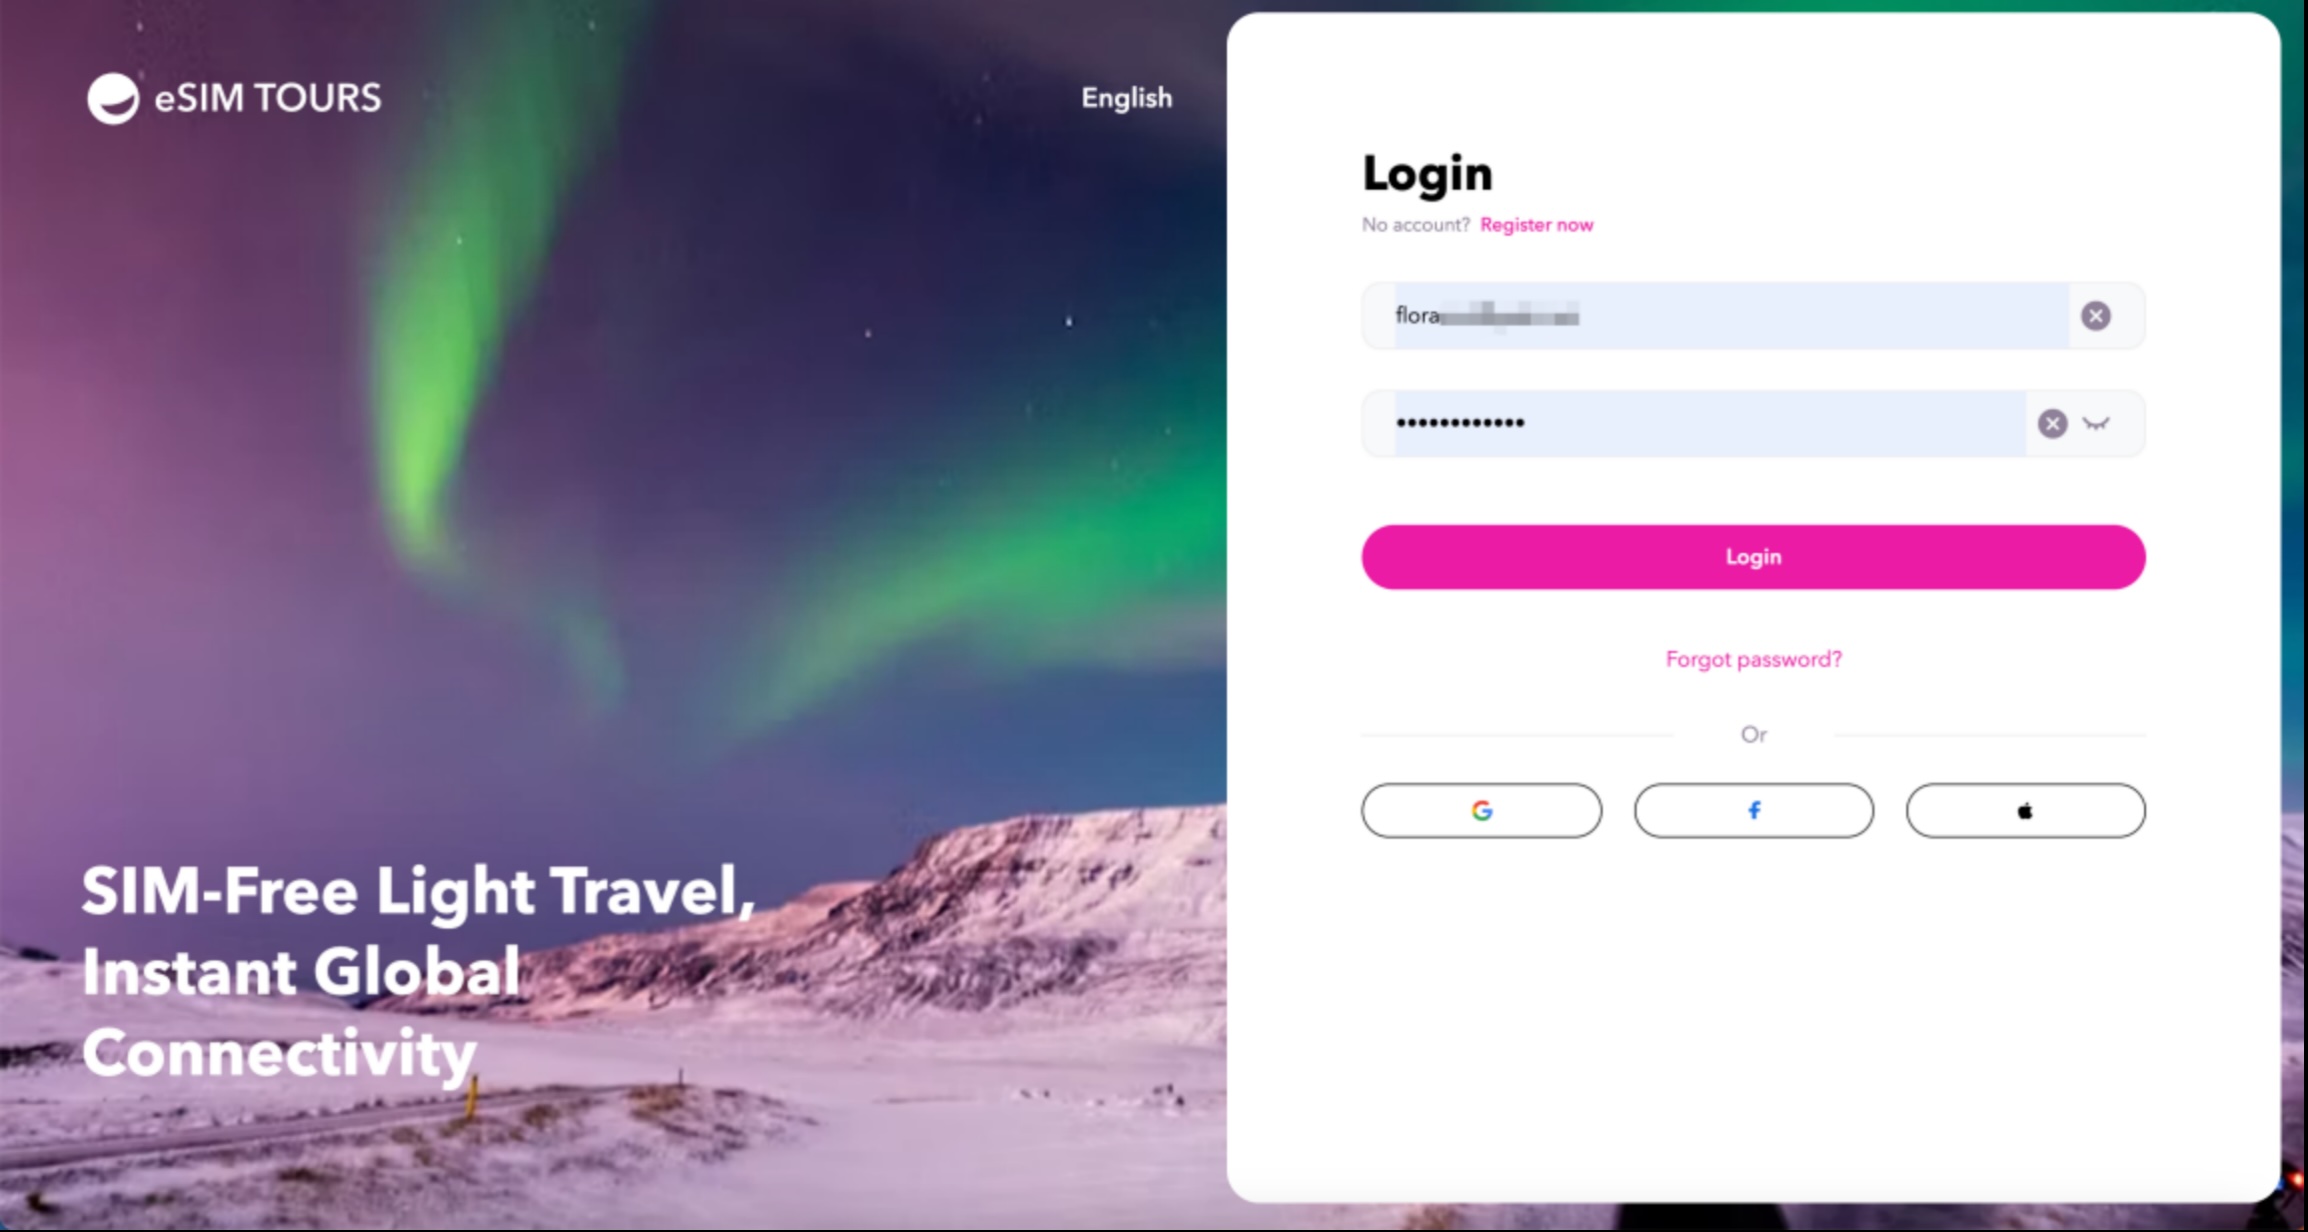
Social Account Login: Click the Google / Facebook / Apple icon, and authorize the corresponding account to complete the login.
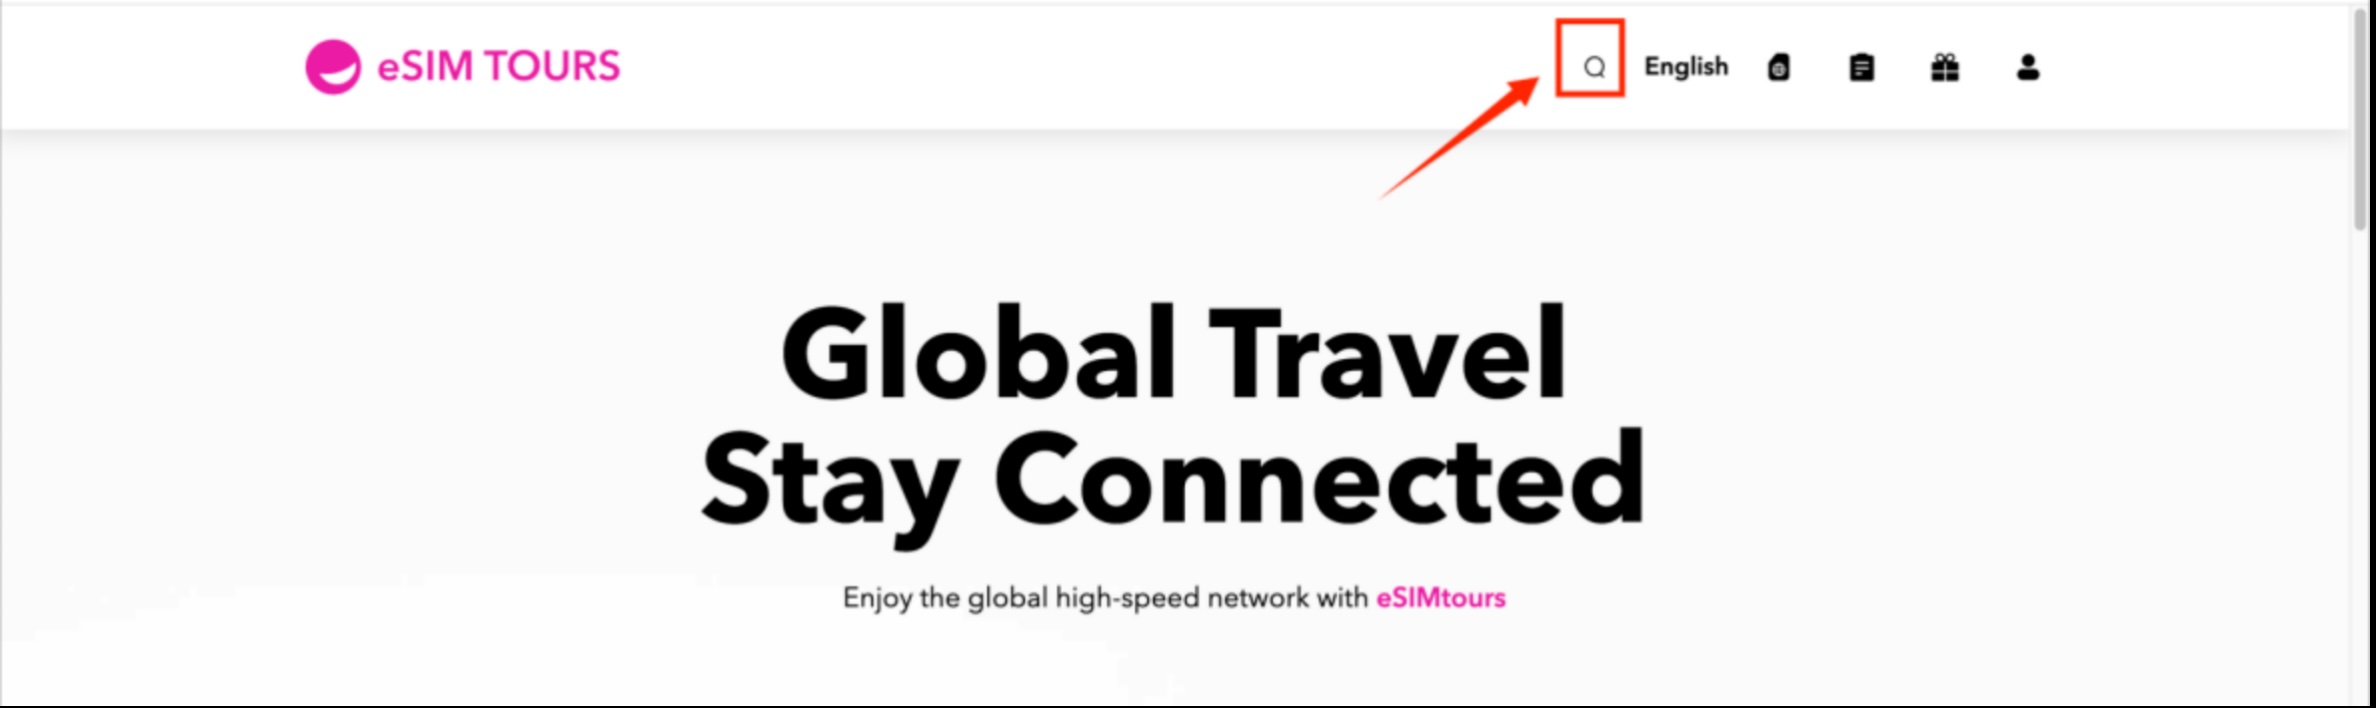
3.2 Plan Inquiry and Purchase
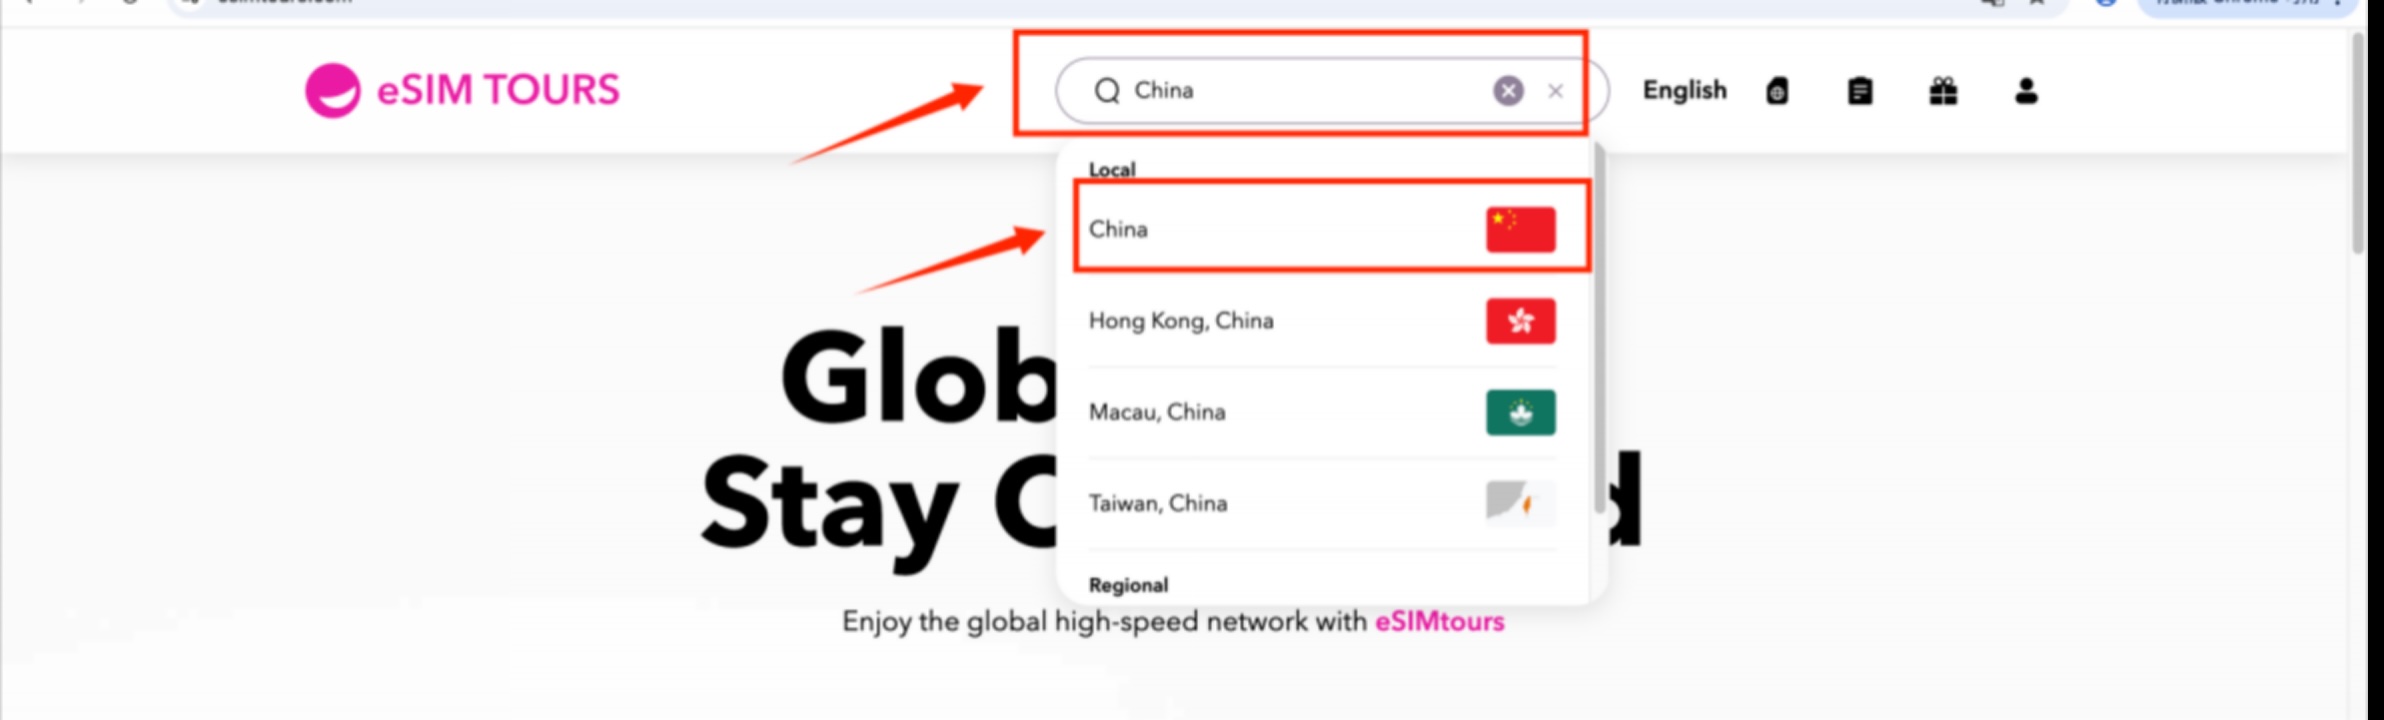
3.2.1 Click the magnifying glass Icon
3.2.2 Enter the destination and select the corresponding one
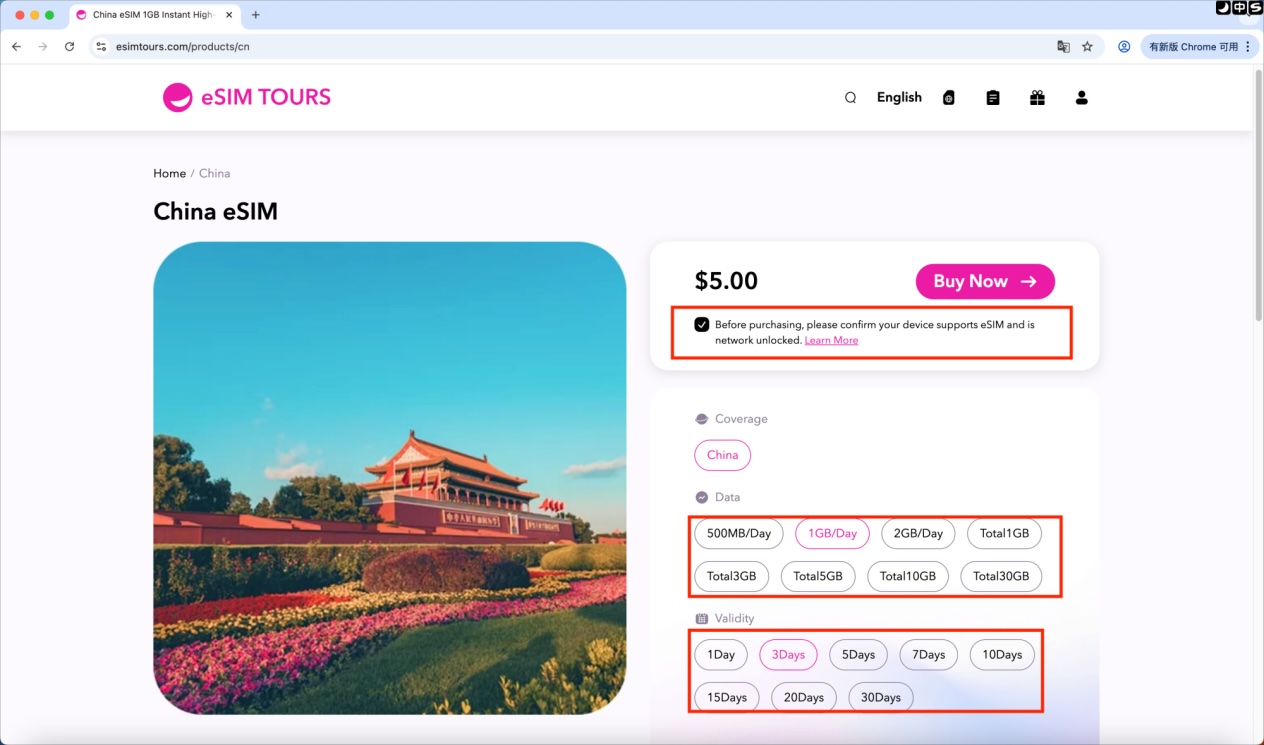
3.2.3 New Purchase
Select the data volume and validity on the page, then check the box to agree to the purchase agreement.
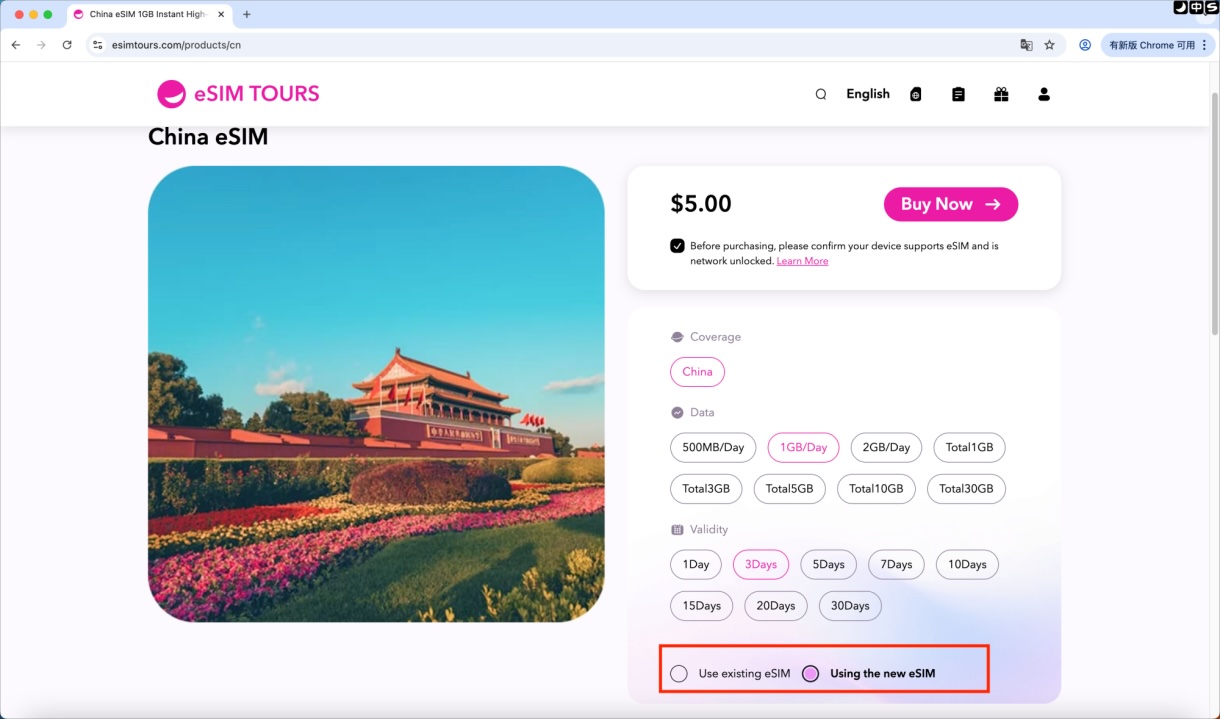
3.2.4 Subsequent Purchase
Select the corresponding data volume and validity period (number of days for purchase), confirm the purchase agreement, confirm the affiliated eSIM (this manual demonstrates the operation method of "using a new eSIM"), and click Buy Now.
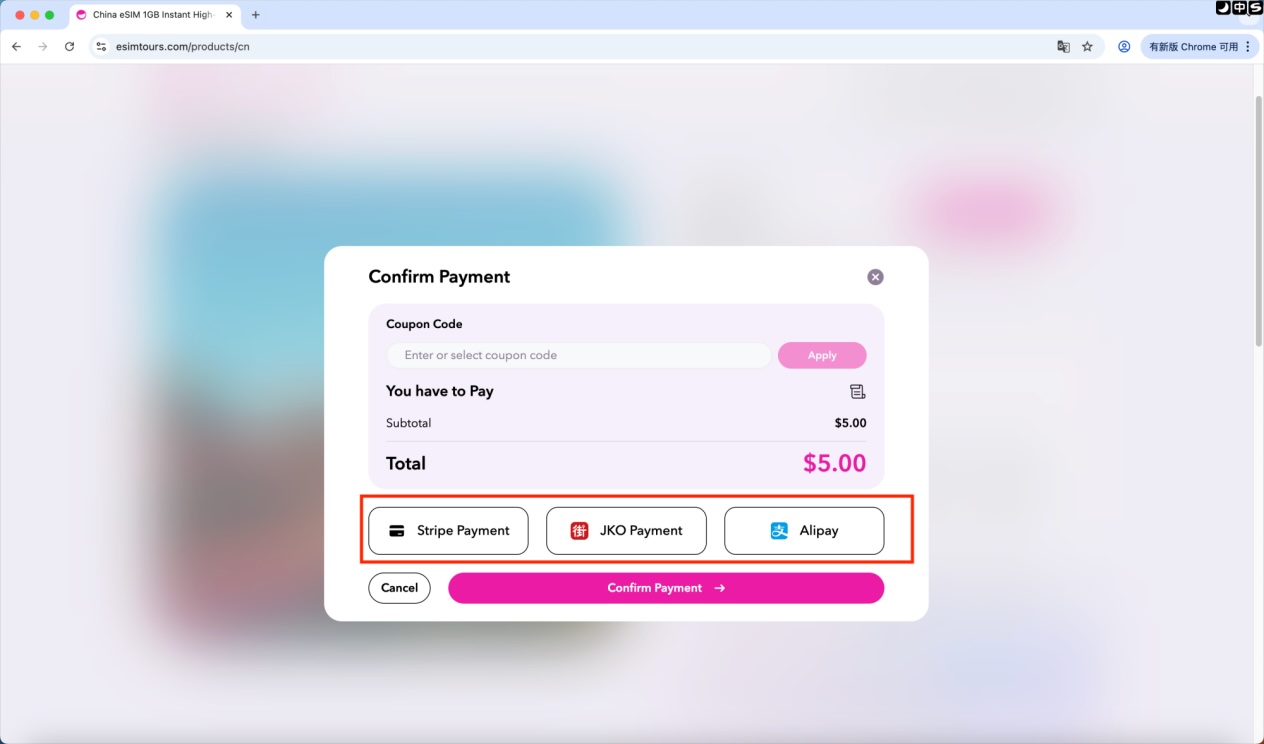
3.2.5 Payment Methods and Coupon Usage
If you have a corresponding coupon, enter the coupon code in the coupon deduction field and click Apply to redeem it.
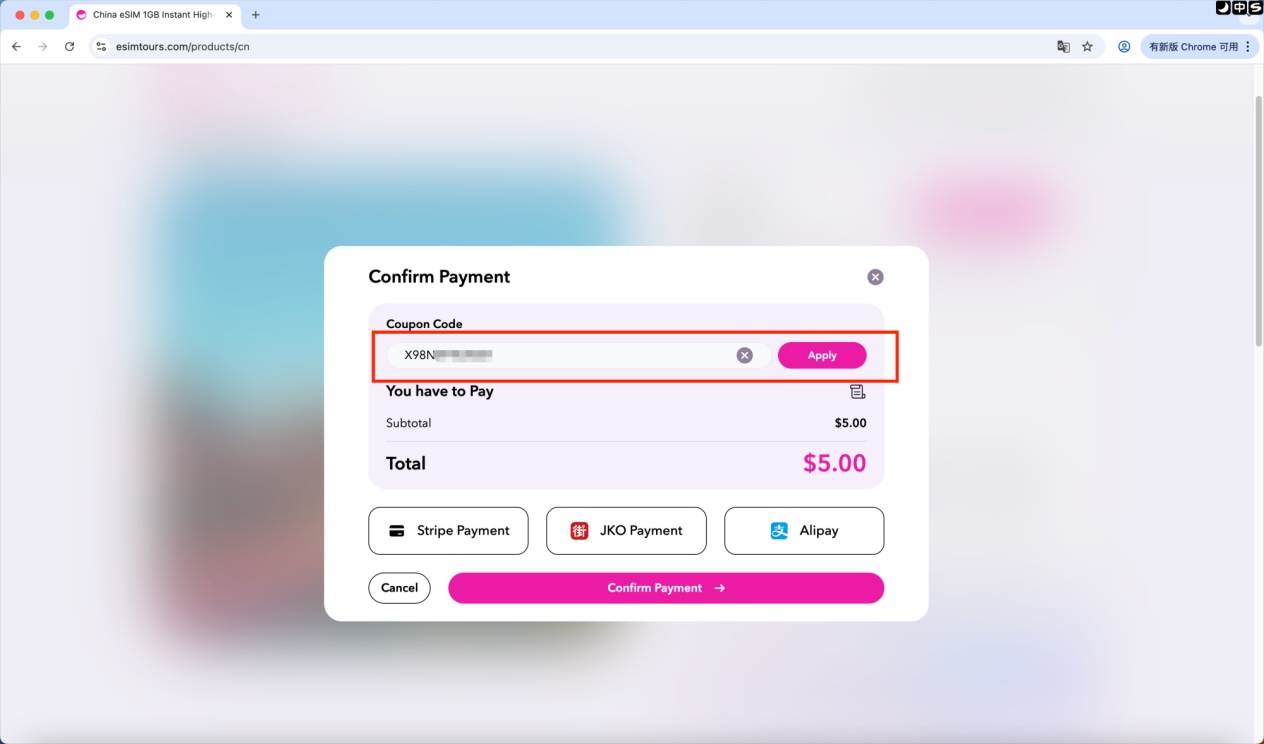
If you do not have a coupon, you can directly select a payment method. We offer three payment options: Stripe Payment, JKO Pay and Alipay. You can choose the payment method that suits you best, click Confirm Payment and complete the subsequent payment process.
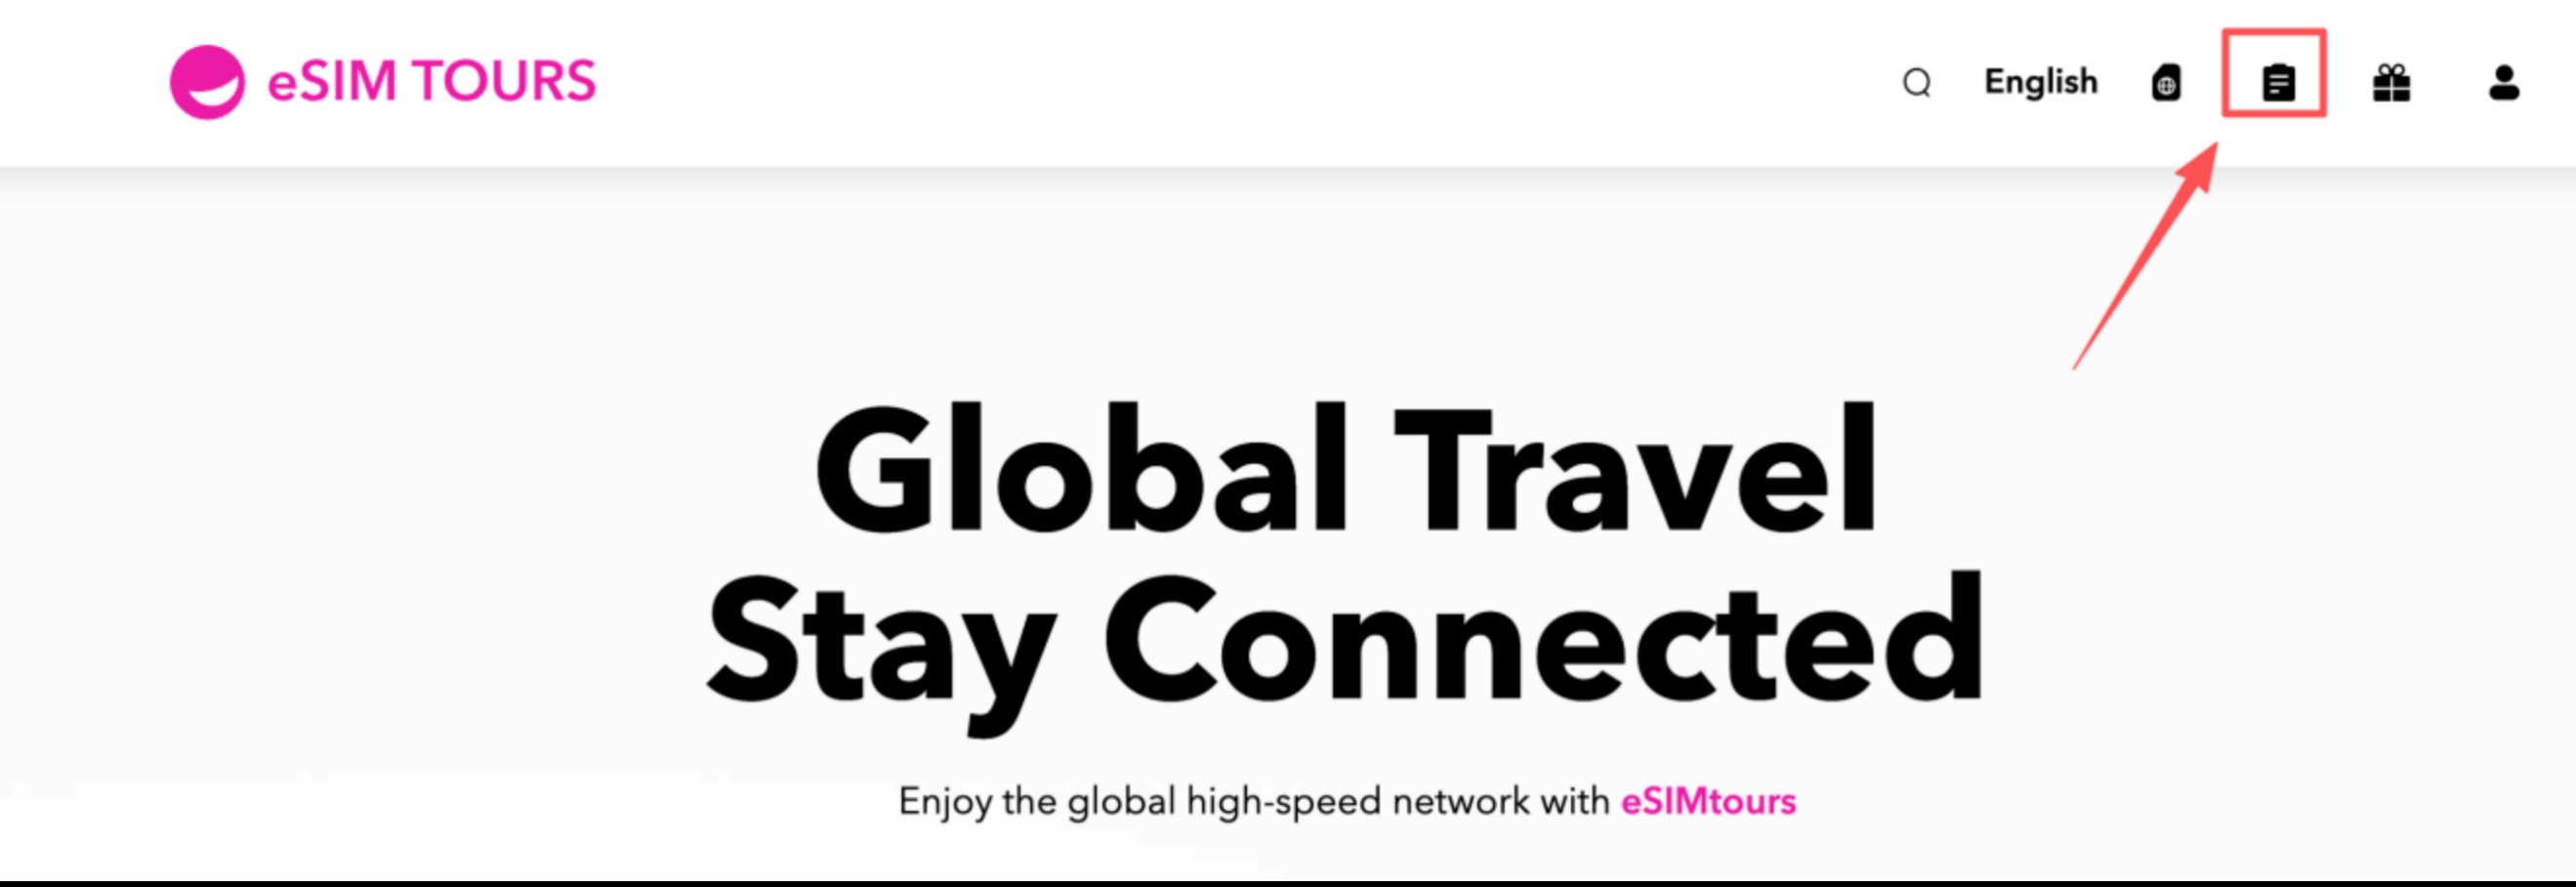
3.3 Order Inquiry
3.3.1 Check Purchased eSIMs

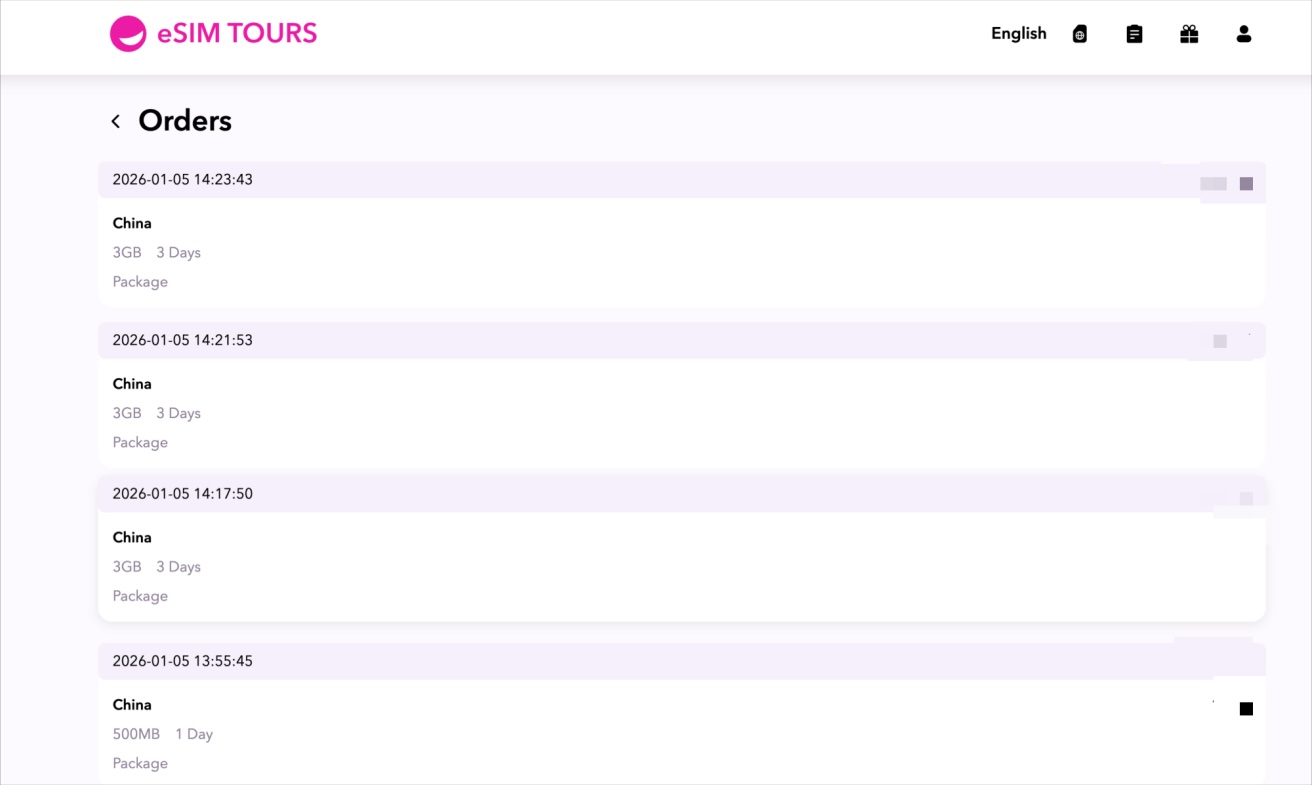
3.3.2 Check Order Status
The order status section includes specific order details, as well as the status of paid, unpaid, and cancelled orders.
3.4 Activation
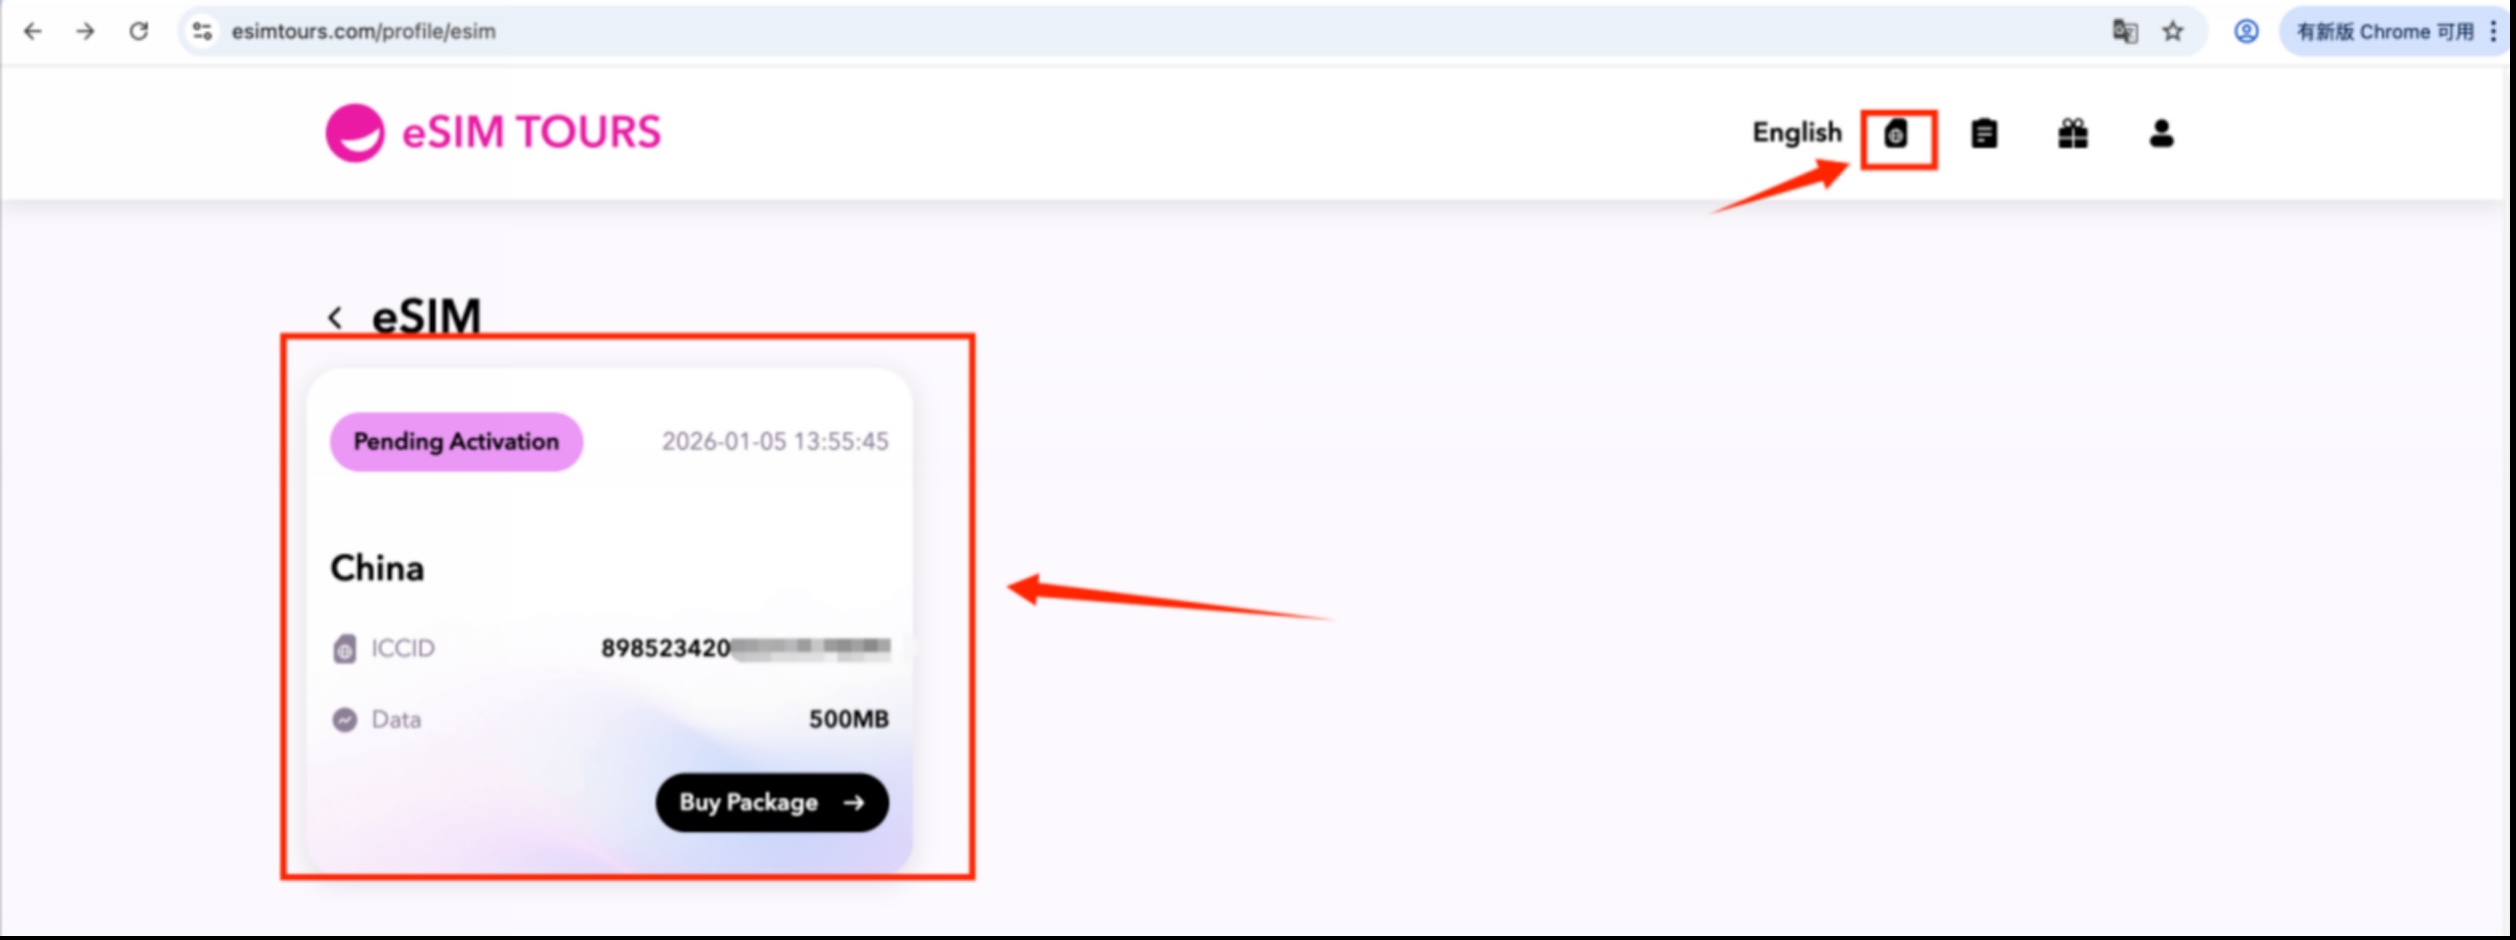
3.4.1 Select the Plan to Be Activated
Click the purchased eSIM on the page and select the plan that you need to activate.
3.4.2 Select the Installation Method
There are two installation methods available: QR code installation and manual installation. QR code installation is recommended as the preferred option.
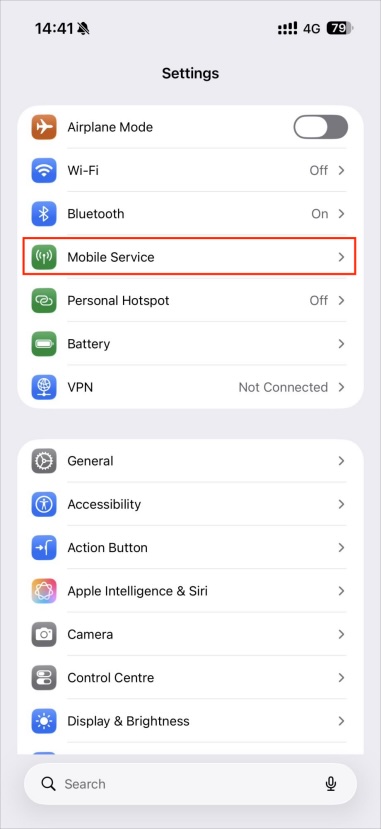
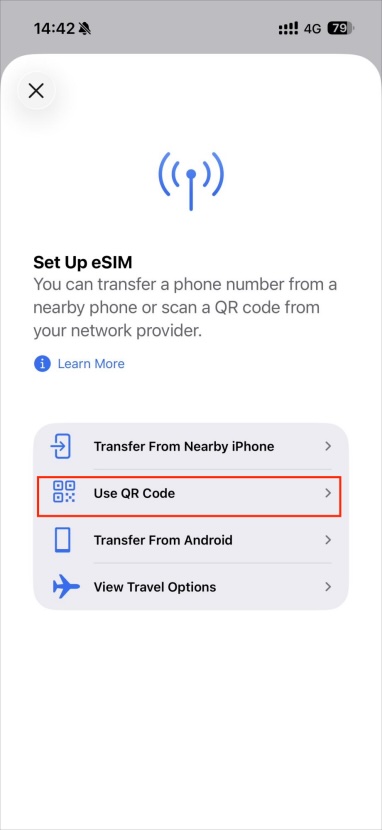
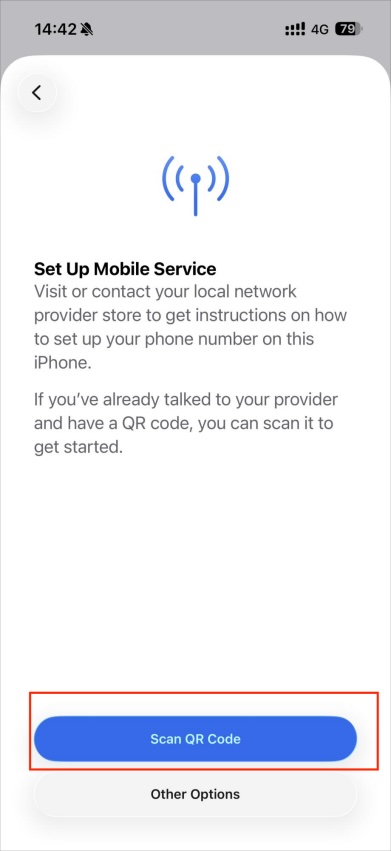
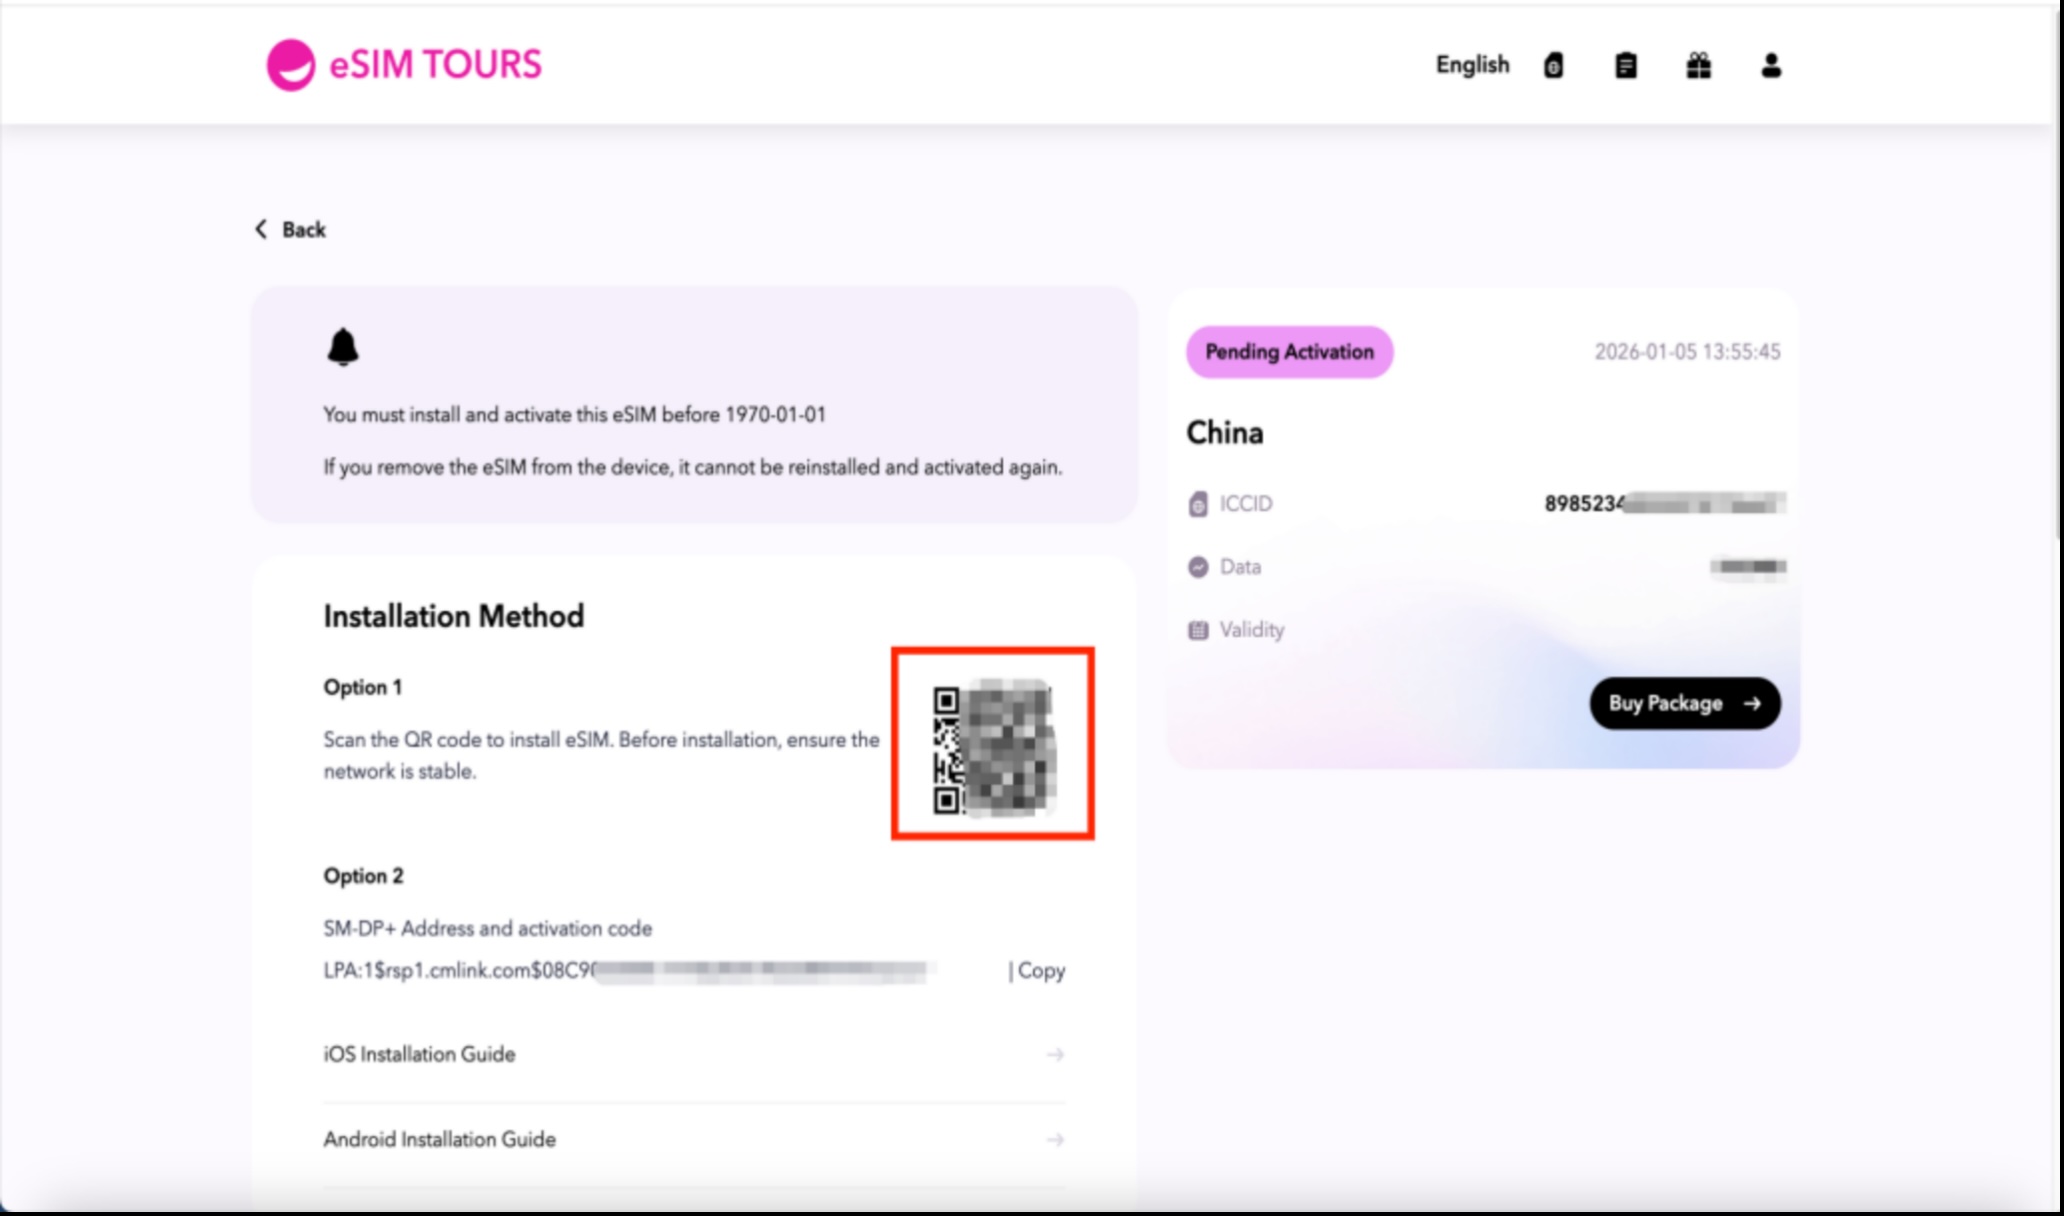
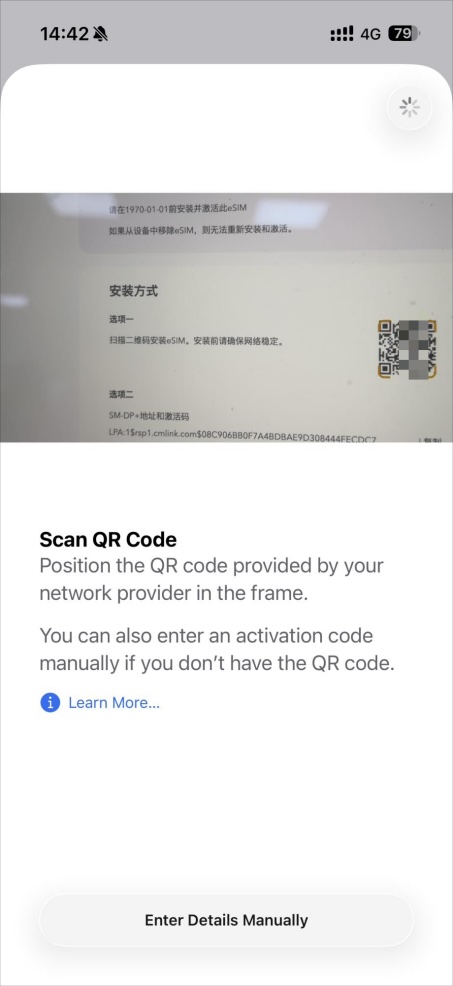
3.4.3 QR Code Installation Steps
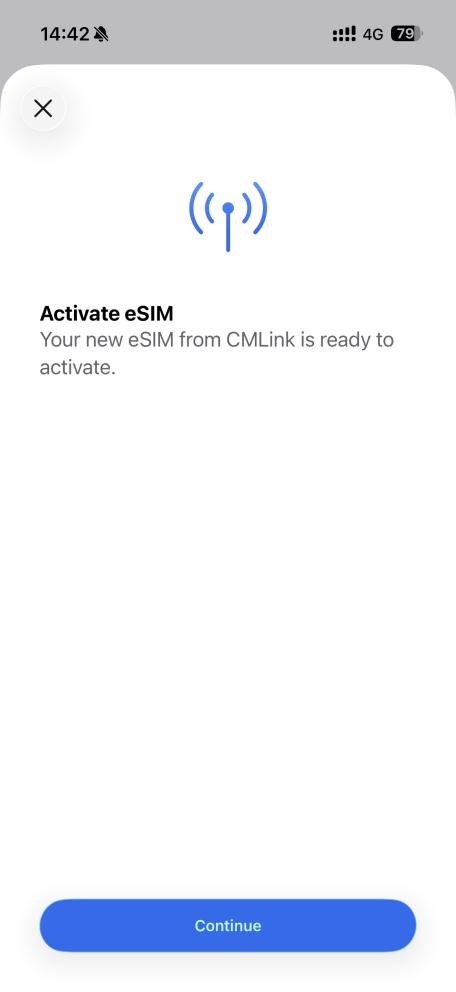
Settings → Mobile Service → Add eSIM → Use QR Code → Click Scan QR Code → Scan the QR code displayed on the activation page

Scan the QR code → Enter Details Manually → Select the eSIM usage regionNote1

Note 1: Home: Select this option when you use the eSIM in the country/region where you currently reside (e.g., daily use within your home country).
Abroad: Select this option specifically when you use the eSIM abroad during international travel.
Select the plan type "Data Only"Note2 → Select whether to enable Low Data ModeNote3
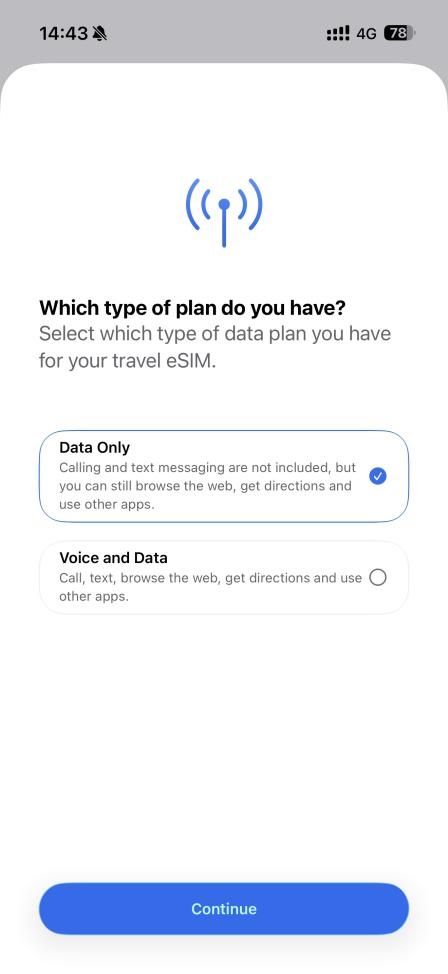
Note 2: Our eSIM provides data services only.
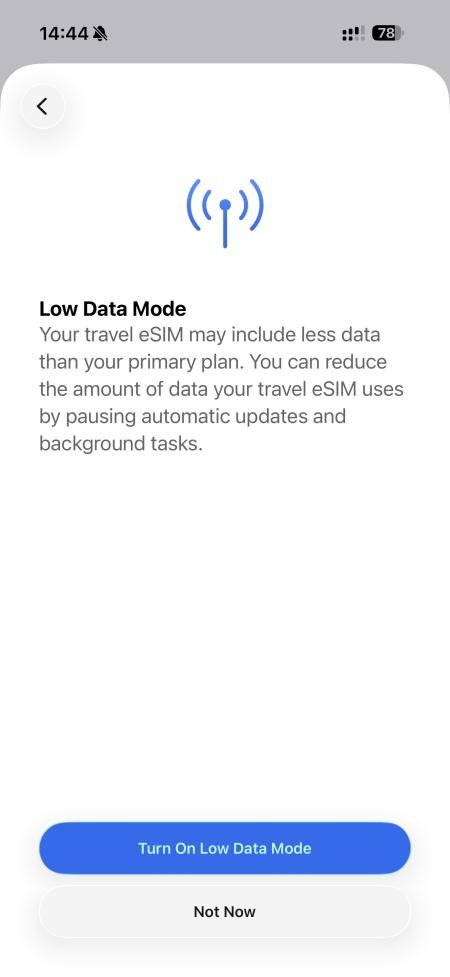
Note 3: Low Data Mode pauses app auto-updates, limits background data refresh, and reduces data usage, but some background features (such as message push notifications) may be delayed.
Non‑Low Data Mode allows apps to auto-update and run background tasks normally with no restrictions, but data is consumed more quickly.
If your eSIM data plan has a small data allowance (e.g., 500 MB per day), it is recommended to enable Low Data Mode to avoid running out of data quickly.
If your plan has ample data (e.g., 1 GB or more per day), you can use Non‑Low Data Mode to ensure full functionality.
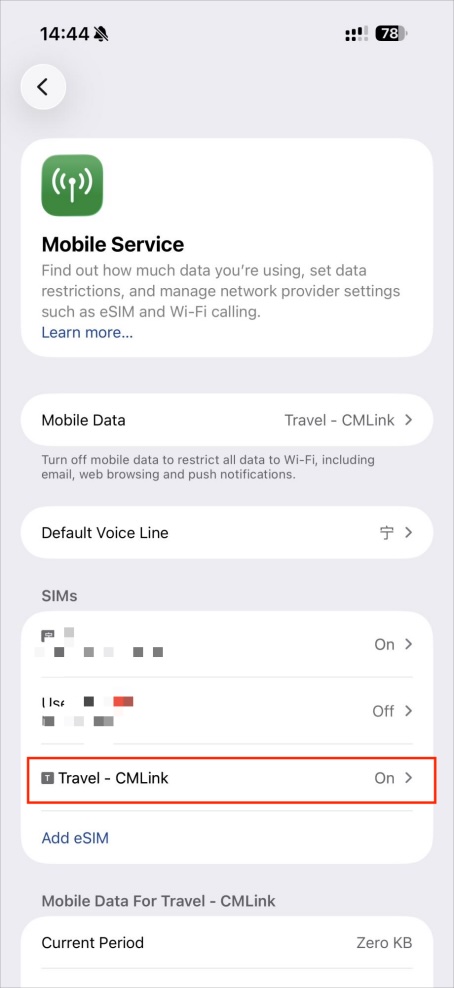
Once the above steps are completed, the eSIM will be visible in your Mobile Service, and your primary SIM card will be set as the default voice number.

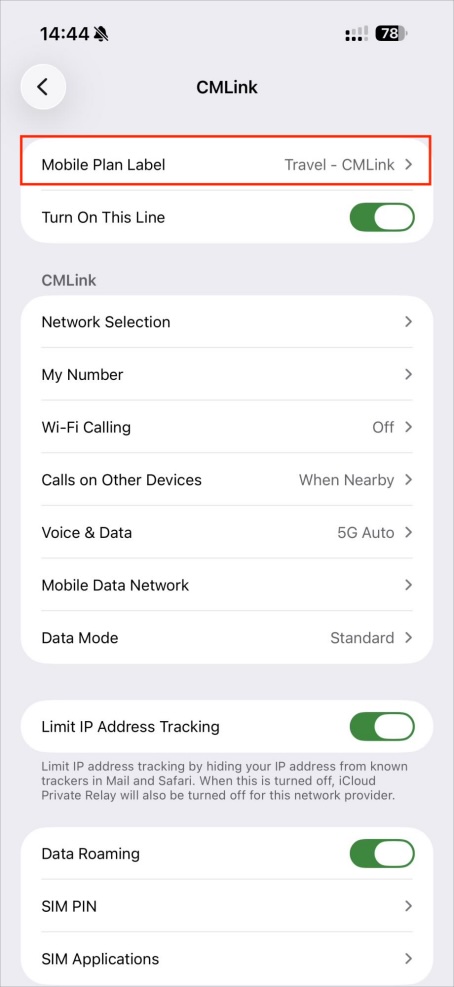
For easy identification, you can also click Mobile Data → select the corresponding eSIM → go to Cellular Number Label to rename the eSIM for easier differentiation